Difference between revisions of "Dual 92mm fan CPU"
Jump to navigation
Jump to search


(q66 test) |
|||
| Line 3: | Line 3: | ||
== Fans Used == | == Fans Used == | ||
* Noctua NF-B9 PWM | * Noctua NF-B9 PWM | ||
| − | ** Tested by [[User:q66|q66]] on single CPU 18-core system. Reports lower max temp and lower noise levels vs stock, under stress testing. Achieves max turbo boost. Performs similarly to NF-A9 PWM with the bundled low noise adapter (LNA), as the NF-B9 PWM is 1600 RPM, while the NF-A9 PWM is 2000 RPM and 1550 RPM with LNA. | + | ** Tested by [[User:q66|q66]] on single CPU 18-core system. Reports lower max temp and lower noise levels vs stock, under stress testing. Achieves max turbo boost. Performs similarly to NF-A9 PWM with the bundled low noise adapter (LNA), as the NF-B9 PWM is 1600 RPM, while the NF-A9 PWM is 2000 RPM and 1550 RPM with LNA. Unlike NF-A9 PWM, it does not have builtin rubber anti-vibration pads, which does not seem to make much actual difference. You are unlikely to find this fan (as NF-A9 PWM is the successor) unless you already have them at home. |
* Noctua NF-A9 PWM | * Noctua NF-A9 PWM | ||
** Tested by [[User:q66|q66]] on a single CPU 18-core system. Stress testing reveals 54°C on hottest core with default speed and 30°C in idle; with LNA, 32°C in idle and 65°C hottest core under prolonged stress testing (sensors reporting maximum CPU power draw/overclock). Therefore, it is safe to use the LNA, as 65°C is well within headroom for maximum turbo boost. | ** Tested by [[User:q66|q66]] on a single CPU 18-core system. Stress testing reveals 54°C on hottest core with default speed and 30°C in idle; with LNA, 32°C in idle and 65°C hottest core under prolonged stress testing (sensors reporting maximum CPU power draw/overclock). Therefore, it is safe to use the LNA, as 65°C is well within headroom for maximum turbo boost. | ||
| Line 10: | Line 10: | ||
== Attaching The Fans == | == Attaching The Fans == | ||
| − | (Noctua NF-A9 Pictured) | + | (Noctua NF-A9 Pictured, for both setups; NF-B9 looks nearly identical) |
| − | [[File:3U CPU NF-A9 01.JPG|left|thumb|800px|Attached using a thin, but stiff, solid stainless steel wire to connect to partially inserted fan screws. An "H" pattern is used to keep the fans aligned with the heat sink.]] | + | [[File:3U CPU NF-A9 01.JPG|left|thumb|800px|[[User:nashimus|nashimus]]: Attached using a thin, but stiff, solid stainless steel wire to connect to partially inserted fan screws. An "H" pattern is used to keep the fans aligned with the heat sink.]] |
| − | [[File:3U CPU NF-A9 02.JPG|left|thumb|800px|The fan is a little crooked in this photo from being handled. An additional strand could prevent the fan from moving, but it doesn't seem necessary at this point. The fans are already pretty snug.]] | + | [[File:3U CPU NF-A9 02.JPG|left|thumb|800px|[[User:nashimus|nashimus]]: The fan is a little crooked in this photo from being handled. An additional strand could prevent the fan from moving, but it doesn't seem necessary at this point. The fans are already pretty snug.]] |
| − | [[File:3U CPU NF-A9 03.JPG|left|thumb|800px|Due to the placement of the heat sink retention mechanism, the fans stand about a centimeter above the top of the heat sink.]] | + | [[File:3U CPU NF-A9 03.JPG|left|thumb|800px|[[User:nashimus|nashimus]]: Due to the placement of the heat sink retention mechanism, the fans stand about a centimeter above the top of the heat sink.]] |
| − | [[File:3U CPU NF-A9 04.JPG|left|thumb|800px]] | + | [[File:3U CPU NF-A9 04.JPG|left|thumb|800px|[[User:nashimus|nashimus]]: ...]] |
| + | |||
| + | [[File:3U-NF-A9-PWM-q66-1.jpg|left|thumb|800px|[[User:q66|q66]]: Attached using several nylon zip ties joined together. The simpler of the methods, but holds the fans perfectly, with no vibrations or obstructions.]] | ||
| + | [[File:3U-NF-A9-PWM-q66-2.jpg|left|thumb|800px|[[User:q66|q66]]: Closeup of the attachment. The overhang is present, just like with method 1, with no way to avoid it, but it doesn't do any harm as long as you have the height in your case available (pretty much any tower or 4U case will have plenty of space)]] | ||
Revision as of 09:57, 31 March 2019
Dual 92mm Fan CPU Cooling
It is recommended to choose a high quality fan for this modification. Also, ensure adequate airflow through the chassis. It is also important to attach the fans in a push-pull configuration, where one of the fans pushes air through the heatsink fins and the other fan takes in hot air and blows it out towards the back of the case. This is achieved by orienting both fans in the same direction. The "base" (grille) side of the fan is the exhaust, while the "blade" side of the fan is the intake. See pictures for proper configuration.
Fans Used
- Noctua NF-B9 PWM
- Tested by q66 on single CPU 18-core system. Reports lower max temp and lower noise levels vs stock, under stress testing. Achieves max turbo boost. Performs similarly to NF-A9 PWM with the bundled low noise adapter (LNA), as the NF-B9 PWM is 1600 RPM, while the NF-A9 PWM is 2000 RPM and 1550 RPM with LNA. Unlike NF-A9 PWM, it does not have builtin rubber anti-vibration pads, which does not seem to make much actual difference. You are unlikely to find this fan (as NF-A9 PWM is the successor) unless you already have them at home.
- Noctua NF-A9 PWM
- Tested by q66 on a single CPU 18-core system. Stress testing reveals 54°C on hottest core with default speed and 30°C in idle; with LNA, 32°C in idle and 65°C hottest core under prolonged stress testing (sensors reporting maximum CPU power draw/overclock). Therefore, it is safe to use the LNA, as 65°C is well within headroom for maximum turbo boost.
- Pending testing by nashimus on dual 18 core system, SC747TG-R1400B-SQ chassis. More photos/info to come when board is back from RMA.
Attaching The Fans
(Noctua NF-A9 Pictured, for both setups; NF-B9 looks nearly identical)

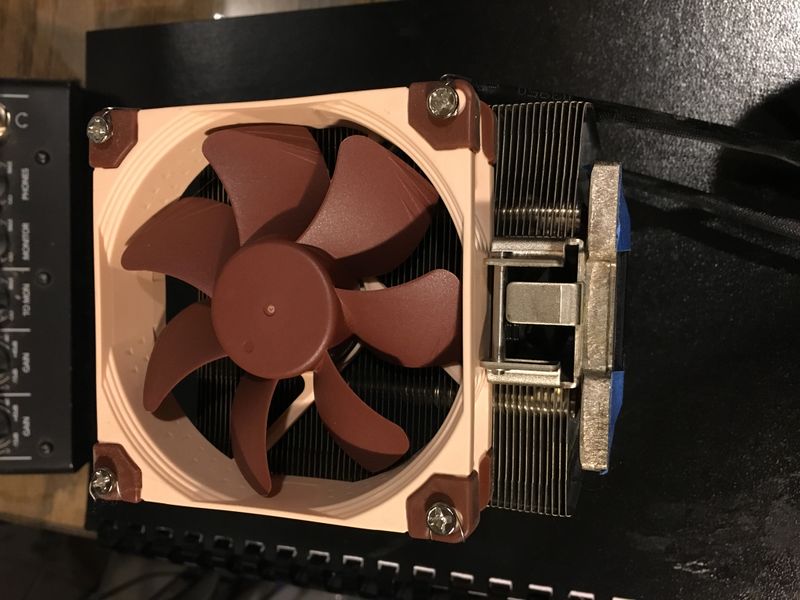
nashimus: Attached using a thin, but stiff, solid stainless steel wire to connect to partially inserted fan screws. An "H" pattern is used to keep the fans aligned with the heat sink.

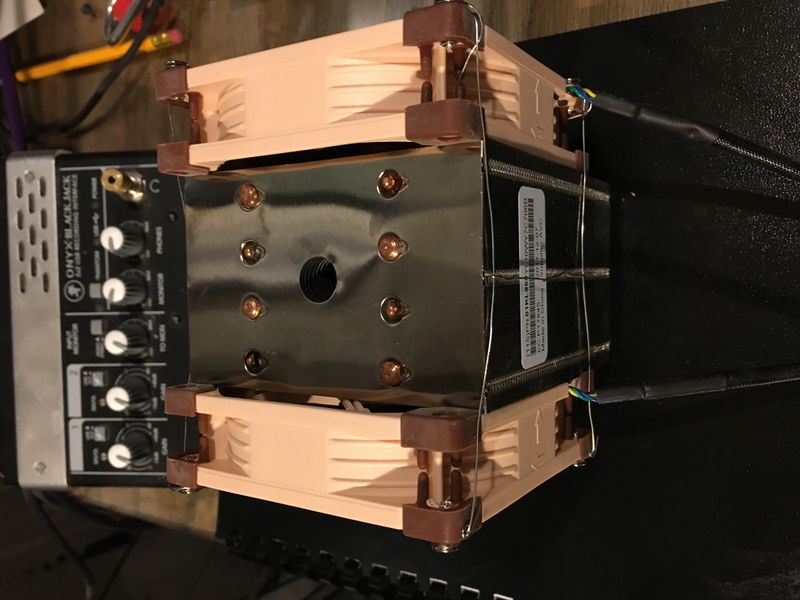
nashimus: The fan is a little crooked in this photo from being handled. An additional strand could prevent the fan from moving, but it doesn't seem necessary at this point. The fans are already pretty snug.

nashimus: Due to the placement of the heat sink retention mechanism, the fans stand about a centimeter above the top of the heat sink.

nashimus: ...

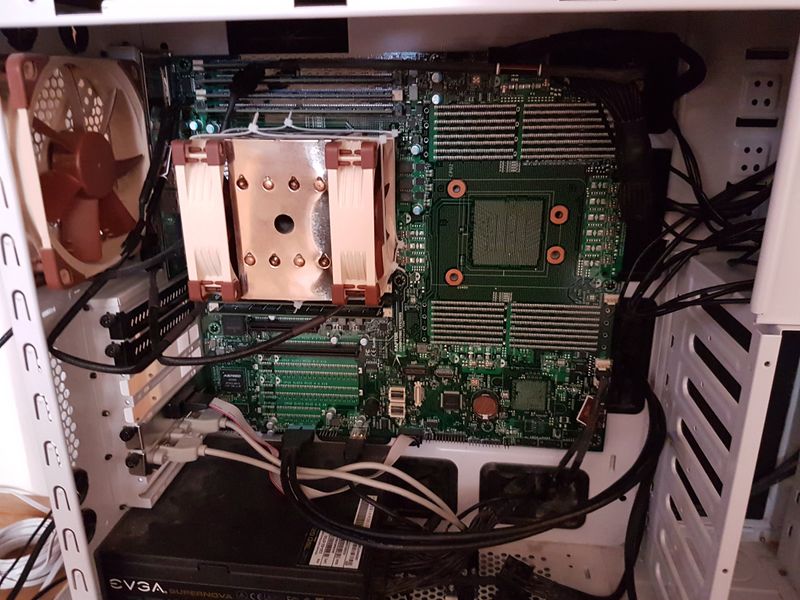
q66: Attached using several nylon zip ties joined together. The simpler of the methods, but holds the fans perfectly, with no vibrations or obstructions.

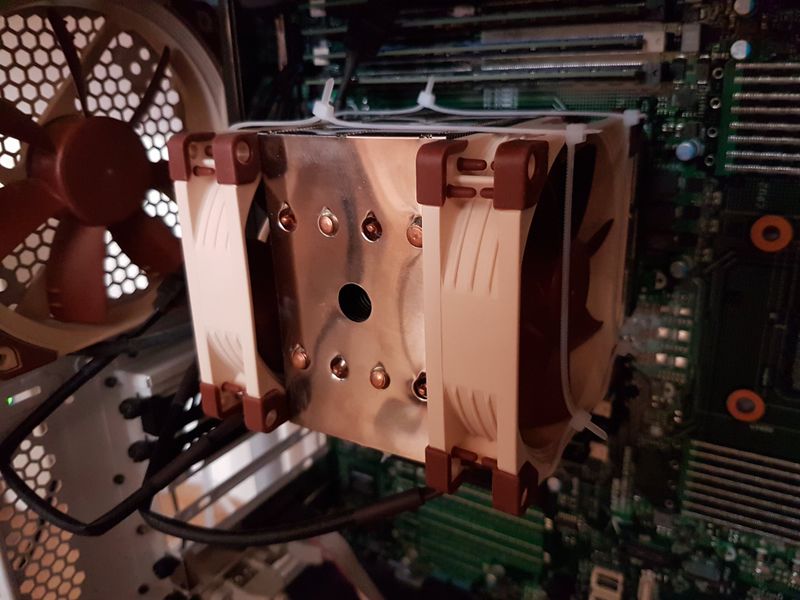
q66: Closeup of the attachment. The overhang is present, just like with method 1, with no way to avoid it, but it doesn't do any harm as long as you have the height in your case available (pretty much any tower or 4U case will have plenty of space)